Yes, you can grow flowers [hydroponically](/hydroponic-growing/how-to-grow-fennel-in-water), and they can bloom faster, more consistently, and with fewer pest problems than soil-grown plants. The key is picking the right species, matching them to a system that fits your space and budget, and keeping your nutrient solution dialed in. This guide walks you through the whole process, from choosing your first flower species all the way to troubleshooting a struggling plant in week four.
How to Grow Flowers Hydroponically: Step by Step Guide
Marcus Holloway
24 Mar 2026
Pick your flowers before you buy anything else
Not every flower thrives hydroponically, but a solid lineup does. Your first decision is what you actually want from the grow: cut flowers for vases, potted indoor blooms, or a continuous display. That goal shapes which species to start with and which system to buy.
For beginners, the best hydroponic flowers are ones that are fast, forgiving, and well-documented. Zinnias are an excellent entry point. They germinate quickly from seed, grow vigorously, and give you blooms in roughly 8 to 10 weeks. Marigolds follow a similar pattern. If you want something that stays compact and works well under grow lights indoors, African violets are a popular choice, with a pH target of 6.0 to 7.0 and an EC range of 1.2 to 1.5 mS/cm. Gerbera daisies, snapdragons, and calendula also perform reliably in hydroponic systems.
Match your species to your goal using this breakdown:
| Flower | Best For | Difficulty | Time to Bloom | Notes |
|---|---|---|---|---|
| Zinnia | Cut flowers | Beginner | 8–10 weeks from seed | Fast, vigorous, lots of variety |
| Marigold | Cut flowers / indoor display | Beginner | 6–8 weeks from seed | Pest-repelling aroma, easy to manage |
| African Violet | Indoor potted blooms | Beginner | Ongoing once established | pH 6.0–7.0, EC 1.2–1.5 mS/cm |
| Gerbera Daisy | Cut flowers | Intermediate | 10–14 weeks from transplant | Needs good airflow and light |
| Snapdragon | Cut flowers | Intermediate | 10–12 weeks from seed | Prefers cooler temps, great for spring/fall |
| Calendula | Cut flowers / edible petals | Beginner | 6–8 weeks from seed | Very forgiving, self-seeds readily |
If you are growing hydroponically for the first time, start with zinnias or marigolds. They are hard to kill, reward you with fast results, and teach you how to read your plants before you invest in something more demanding.
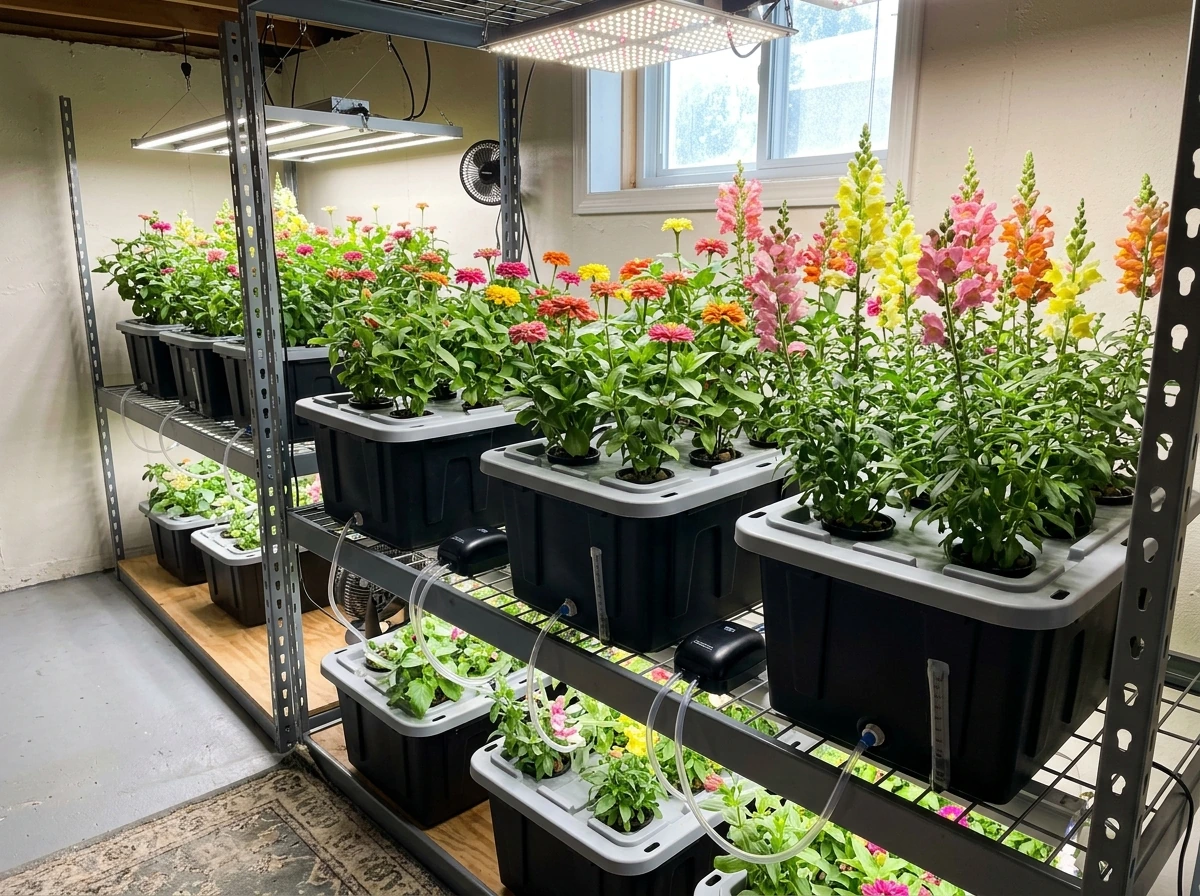
Which hydroponic system works best for flowers
There are five main hydroponic system types you will encounter: wick, deep water culture (DWC), top-feed or drip, ebb-and-flow (flood-and-drain), and aeroponics. Each has real trade-offs for flower growing specifically.
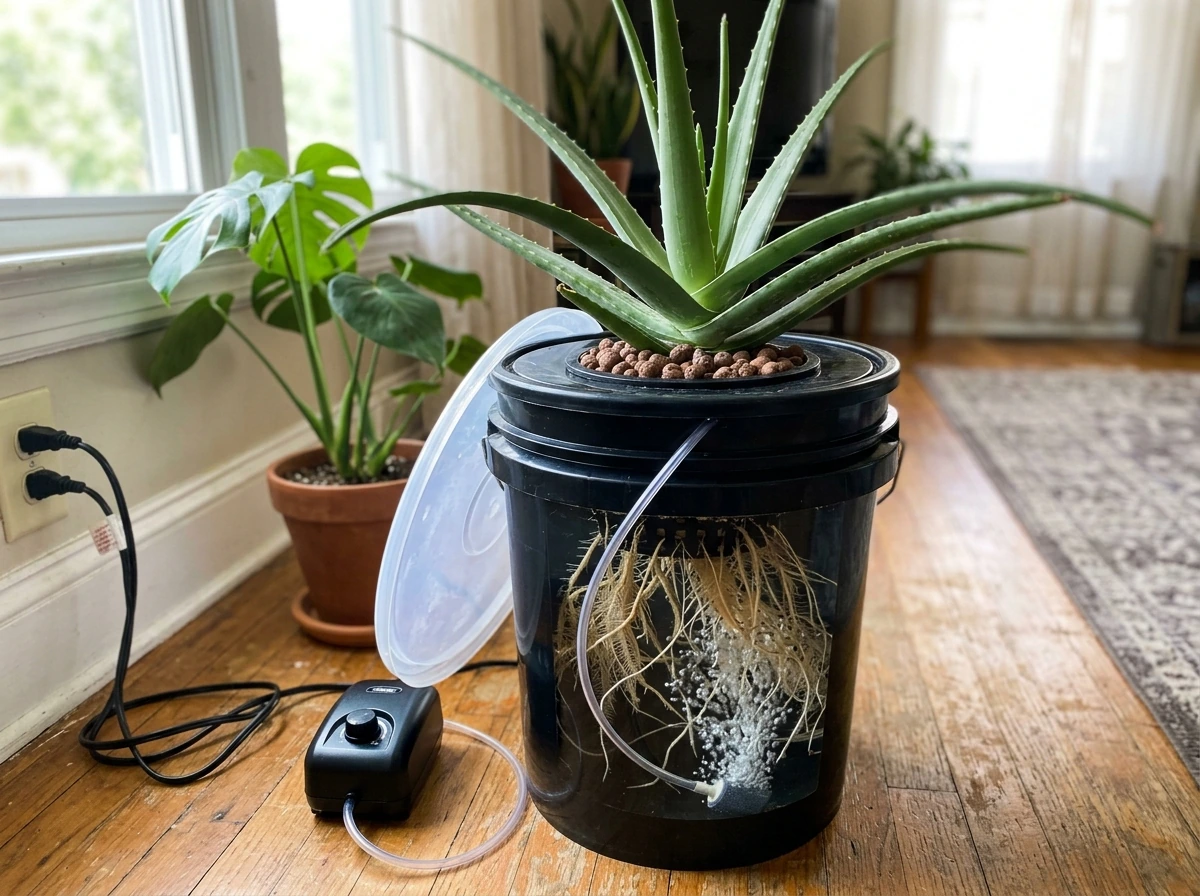
Deep Water Culture (DWC)
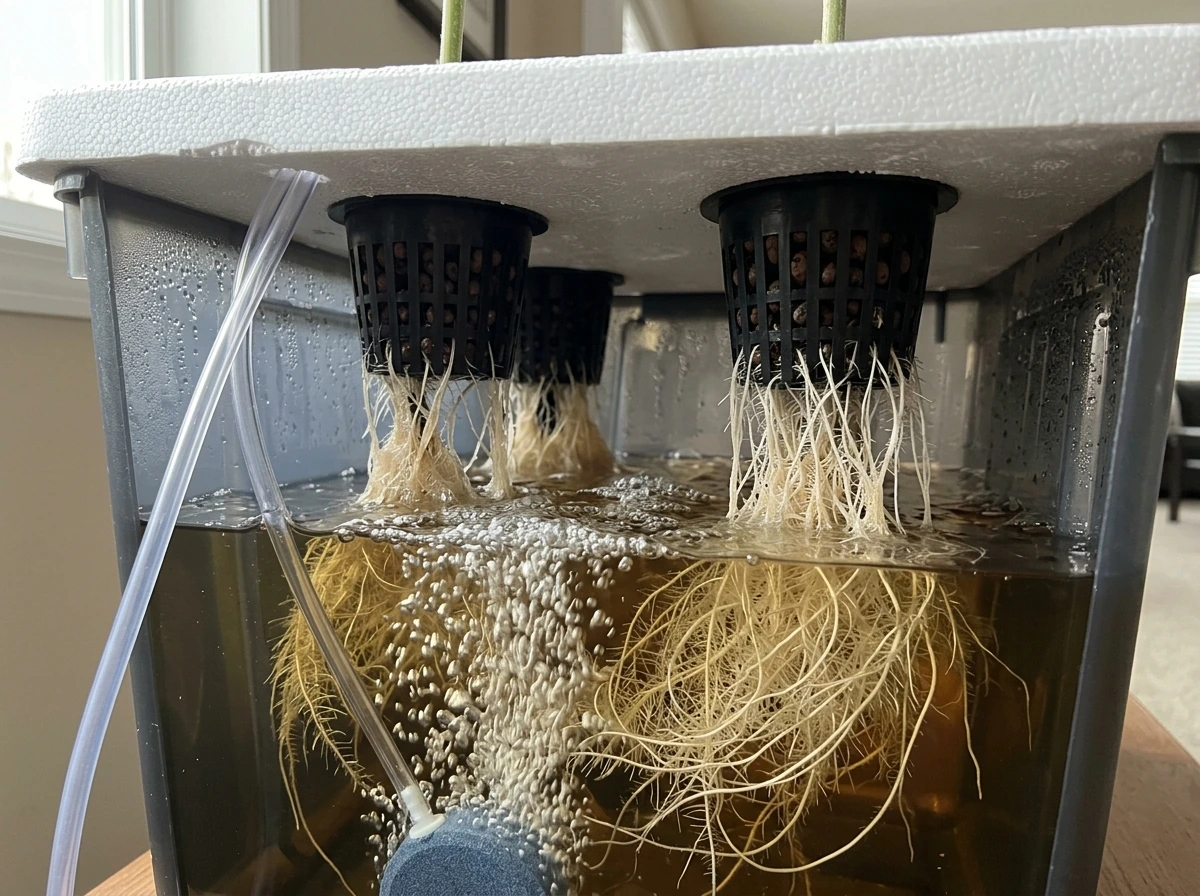
DWC suspends plant roots directly in oxygenated, nutrient-rich water inside a reservoir. Plants sit in net pots on a floating board or lid. An air pump and air stones keep the water oxygenated. This is one of the simplest systems to build, and it works well for medium-sized flowering plants like zinnias, marigolds, and gerberas. The main upside is that roots always have access to nutrients and water. The main downside is that if your air pump fails, roots suffocate fast, so always have a backup.
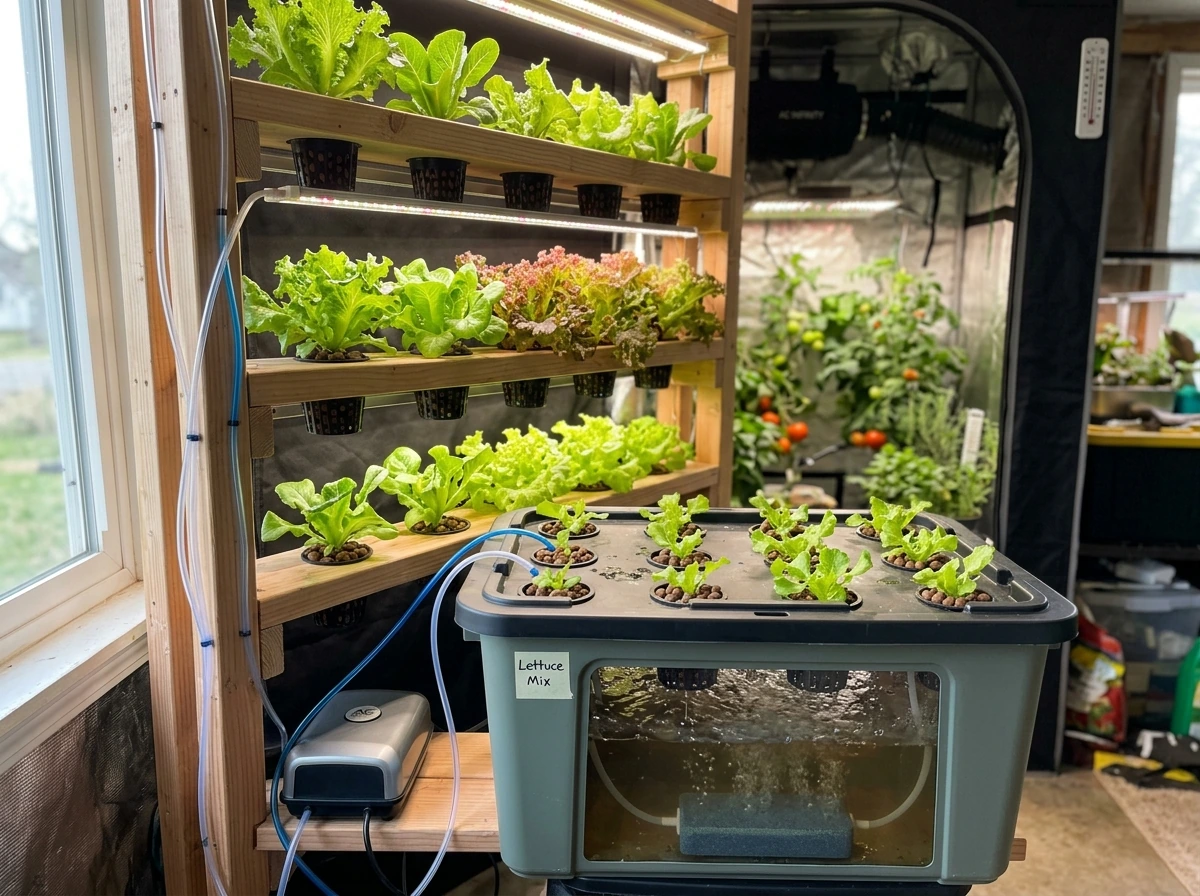
Ebb-and-Flow (Flood-and-Drain)
Ebb-and-flow works by periodically flooding a grow tray with nutrient solution, then draining it back into a reservoir below. The flood-and-drain cycle does something smart: as the solution drains, it pulls fresh air down into the root zone. This makes it excellent for flowering plants that need both moisture and oxygen at the root level. It is also very flexible since you can grow plants in individual pots of growing media, making it easy to move plants around. This is my personal recommendation for anyone growing cut flowers at a small-to-medium scale.
Top-Feed or Drip Systems
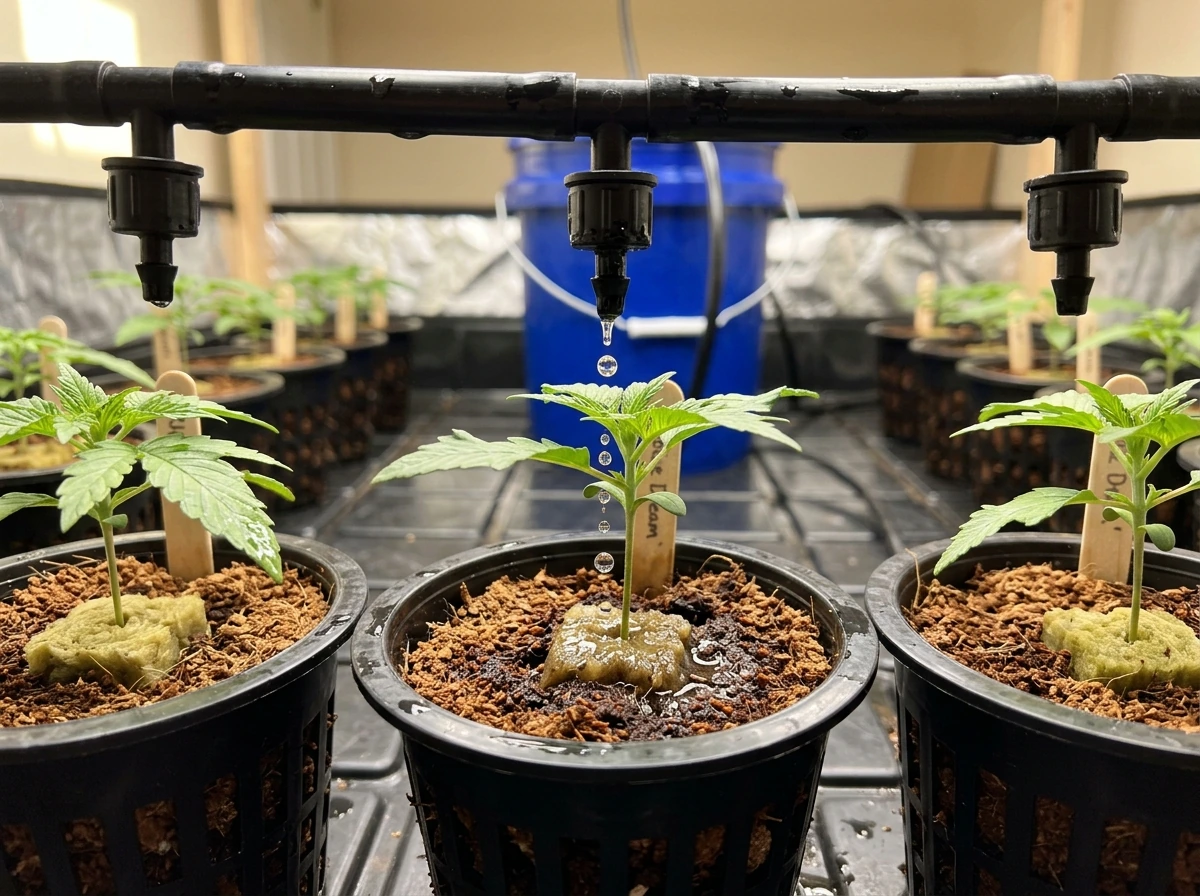
Drip systems deliver nutrient solution directly to the base of each plant through emitters. They scale well, handle larger plants like tall snapdragons or gerberas comfortably, and give you precise control over feed timing. They do require more maintenance to keep emitters clear and returns clean.
Wick and Aeroponics
Wick systems are passive and simple but too slow for most flowering plants, which tend to need more water and nutrients than a wick can deliver at peak growth. Aeroponics is on the opposite end: very high performance and fast growth, but the equipment cost and maintenance demands make it overkill unless you are already experienced. If you want to learn more about how to grow aeroponics, that is a separate setup to research once you have a few grows under your belt. If you want to explore aeroponics, that is a separate setup to research once you have a few grows under your belt.
| System | Best For | Complexity | Cost to Start | Flower Suitability |
|---|---|---|---|---|
| DWC | Compact plants, beginners | Low | Low ($30–$80 DIY) | Very good |
| Ebb-and-Flow | Cut flowers, medium grows | Medium | Medium ($80–$200) | Excellent |
| Drip / Top-Feed | Larger or taller flowers | Medium | Medium ($100–$250) | Very good |
| Wick | Tiny, low-demand plants | Very low | Very low | Poor for most flowers |
| Aeroponics | Experienced growers, fast growth | High | High ($200+) | Excellent but overkill for beginners |
For a first build, go with DWC if you want simplicity, or ebb-and-flow if you want flexibility and the best root oxygenation for flowering plants.
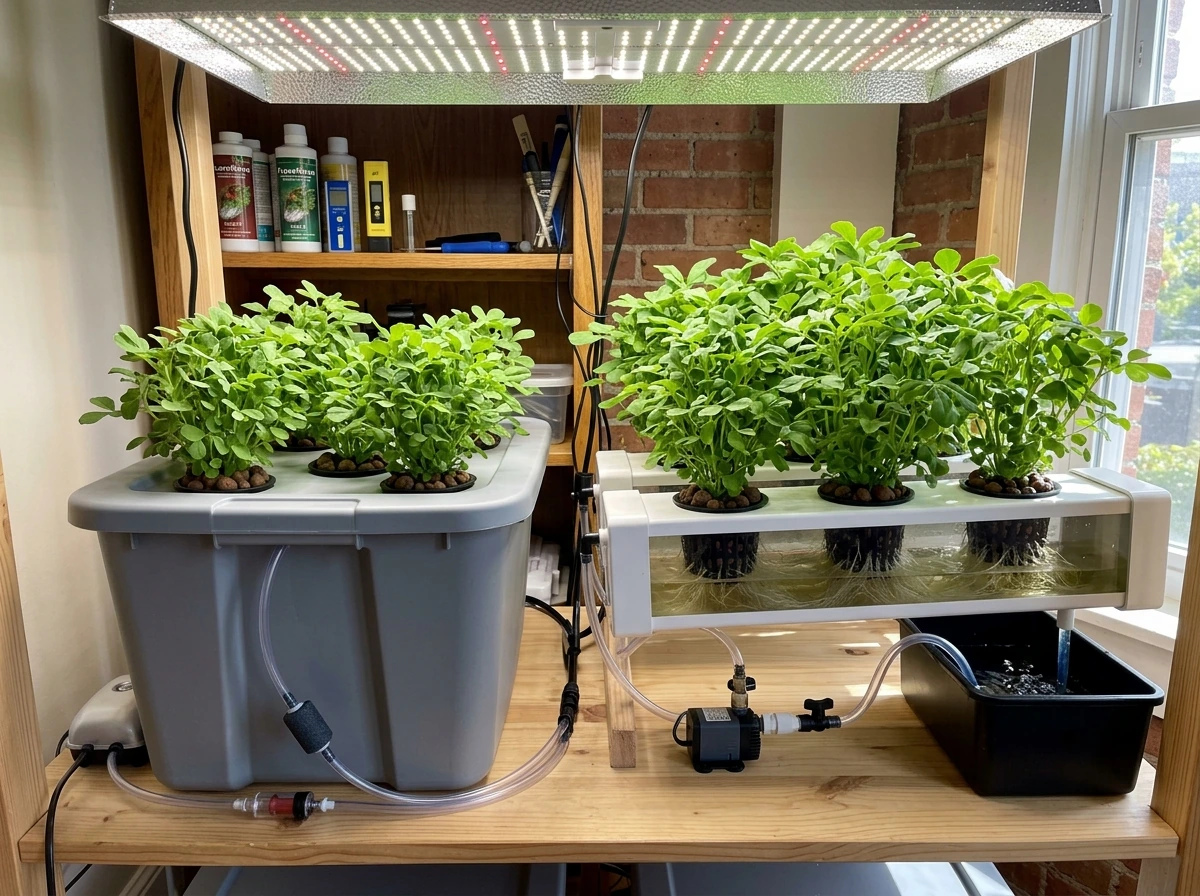
What equipment you actually need
Here is a practical equipment list for a beginner DWC or ebb-and-flow setup sized for 4 to 12 flowering plants:
- Reservoir: a food-safe, opaque container (opaque is critical to block light and prevent algae). For DWC, a 5 to 20 gallon tote works. For ebb-and-flow, a grow tray plus a separate reservoir below.
- Net pots: 2-inch pots for seedlings and plugs, 3- to 4-inch pots for larger flowering plants.
- Growing media: expanded clay pebbles (hydroton), rockwool cubes, or perlite. Clay pebbles are reusable and widely used for flowers.
- Air pump and air stones: essential for DWC; also useful for any reservoir to keep dissolved oxygen high. Size the pump to your reservoir volume.
- Water pump and timer: for ebb-and-flow and drip systems, a submersible pump with a programmable timer controls the flood cycles.
- Overflow and drain fittings: for ebb-and-flow trays to control max flood height and allow complete drainage.
- pH meter: a calibrated digital meter is non-negotiable. Budget at least $30 for a reliable one.
- EC/TDS meter: measures nutrient concentration in your solution.
- pH up and pH down solutions: for adjusting solution pH after mixing nutrients.
- Hydroponic nutrient solution: a two- or three-part liquid nutrient formulated for hydroponics (with a bloom/flowering formula for the later stage).
- Grow lights: LED grow lights are most practical indoors. More detail in the next section.
- Thermometer and humidity gauge: to monitor your grow environment.
- Timer for lights: to automate your photoperiod.
One thing I learned the hard way: cheap pH meters drift quickly and will wreck your nutrient solution if you trust a bad reading. Calibrate your meter with buffer solution every week, especially when you are new to this.
How to set up your hydroponic system step by step
These steps apply to a DWC or ebb-and-flow build. Adjust specifics for your chosen system as needed.
- Choose and prepare your reservoir. Make sure it is completely opaque. Rinse it thoroughly with plain water before use. For ebb-and-flow, install your overflow fitting at the height you want the flood level (usually 1 to 2 inches below the top of your growing media) and your drain fitting at the tray bottom.
- Set up aeration. Place air stones in the bottom of the reservoir and connect them to the air pump with tubing. For DWC, the air should be running constantly. For ebb-and-flow, you still want aeration in the reservoir to keep standing water oxygenated between cycles.
- Mix your nutrient solution. Fill the reservoir with fresh, room-temperature water. Add your nutrients according to the manufacturer's instructions, starting at roughly half strength for your first fill while your plants are establishing. Mix thoroughly.
- Adjust pH. Test the solution with your pH meter and adjust to 5.5 to 6.0 for most flowering plants using pH up or pH down. Let the solution sit for 5 minutes and retest before adding plants.
- Check EC. Confirm your EC reading is appropriate for your plants' current growth stage (see the growing conditions section below).
- Set up your net pots and growing media. Rinse clay pebbles before use to remove dust. Place them in net pots and seat the pots in the reservoir lid (DWC) or the tray (ebb-and-flow).
- Position and install your grow lights above the system. Set the light timer before you transplant so the environment is stable from day one.
- Set your flood timer. For ebb-and-flow, a common starting schedule is 2 to 4 flood cycles per day during lights-on hours, with each cycle lasting 15 to 30 minutes or until the tray fills, then draining completely. Adjust based on your growing media's water retention.
- Do a test run before adding plants. Run a complete flood-and-drain or DWC aeration cycle with just nutrient solution to check for leaks and confirm everything is working.
The growing conditions that actually drive blooms
Light
Most flowering plants need 14 to 18 hours of light per day during vegetative growth, then 12 hours of light and 12 hours of darkness to trigger flowering in photoperiod-sensitive species. Zinnias, marigolds, and calendula are day-neutral and will bloom under either schedule, but they still need high light intensity. Target a light intensity of at least 400 to 600 micromoles per square meter per second (PPFD) for vegetative growth, and 600 to 900+ PPFD during bloom. Full-spectrum LED panels designed for flowering work well. Keep lights 12 to 24 inches above plant tops, adjusting as they grow.
Nutrients and feeding
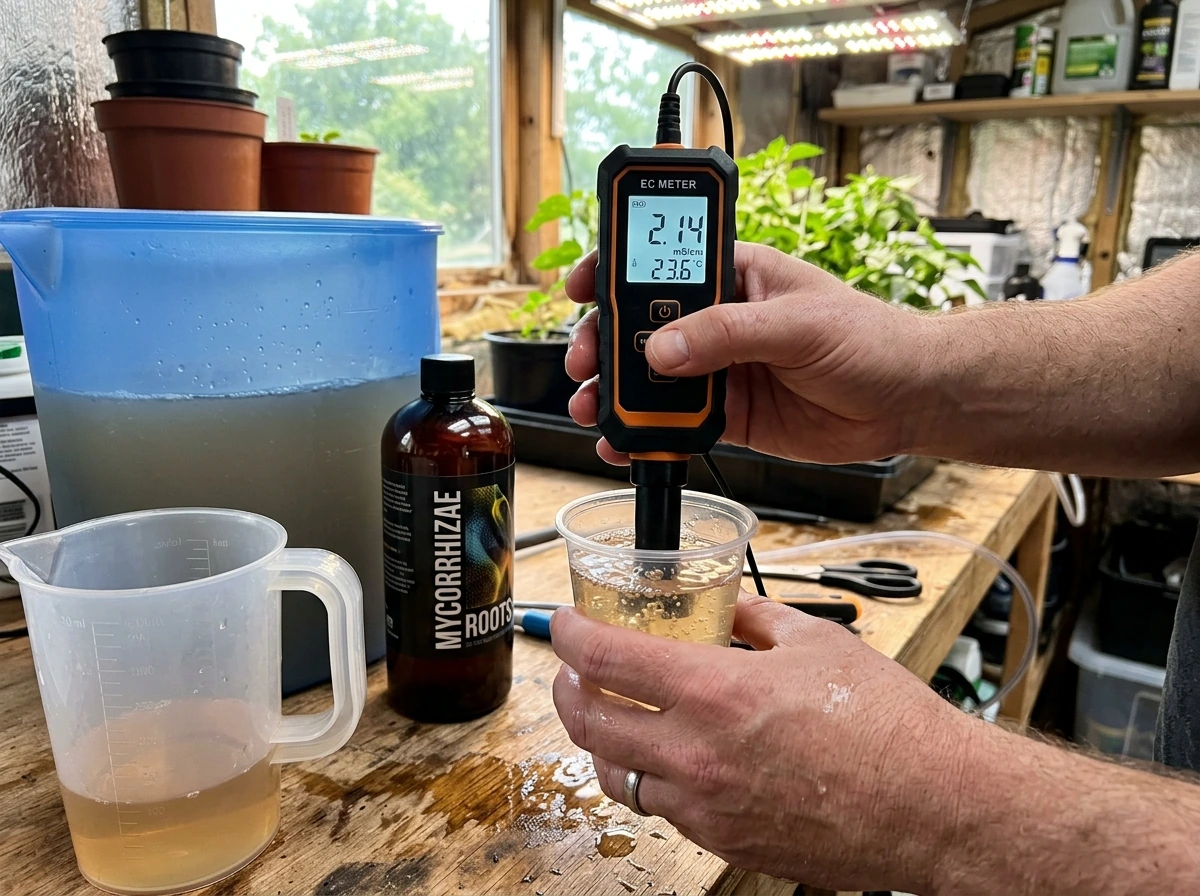
Use a two- or three-part hydroponic nutrient formula. During the vegetative stage, use a balanced formula with slightly higher nitrogen. Once flower buds appear, switch to a bloom formula that is higher in phosphorus and potassium to support bud development and flowering. Start seedlings at about 300 to 400 ppm (roughly 0.6 to 0.8 mS/cm EC) and build up to 1.2 to 2.0 mS/cm during active growth and bloom, depending on the species. Generally, stay under 2.5 mS/cm unless you are growing a crop specifically documented to tolerate higher EC levels.
pH and EC
Keep your nutrient solution pH between 5.5 and 6.5. A target of 5.5 is common when mixing fresh solution, with the pH in the root zone ideally sitting closer to 6.0 to 6.5. Most nutrient lockout problems I have seen come from pH drifting above 7.0 or dropping below 5.0, both of which block key nutrients even when they are present in the solution. Check pH and EC every day or every other day, especially in smaller reservoirs where conditions shift faster.
Temperature
Air temperature in the grow space should sit between 65 and 80°F (18 to 27°C) for most common hydroponic flowers. Snapdragons and calendula prefer the cooler end of that range. Reservoir water temperature should stay between 65 and 72°F (18 to 22°C). Warmer water holds less dissolved oxygen and is more hospitable to root pathogens, so keep it cool if you can.
Oxygen at the root zone
Roots in hydroponic systems depend almost entirely on mechanical aeration for their oxygen supply. In DWC, this means running an appropriately sized air pump continuously. In ebb-and-flow, the drain cycle itself pulls fresh air into the root zone, which is one of the main reasons the system works so well for flowering plants. If roots ever look brown, slimy, or matted, poor oxygenation is often the first place to look.
Starting your plants: seeds, seedlings, and cuttings
Starting from seed in rockwool
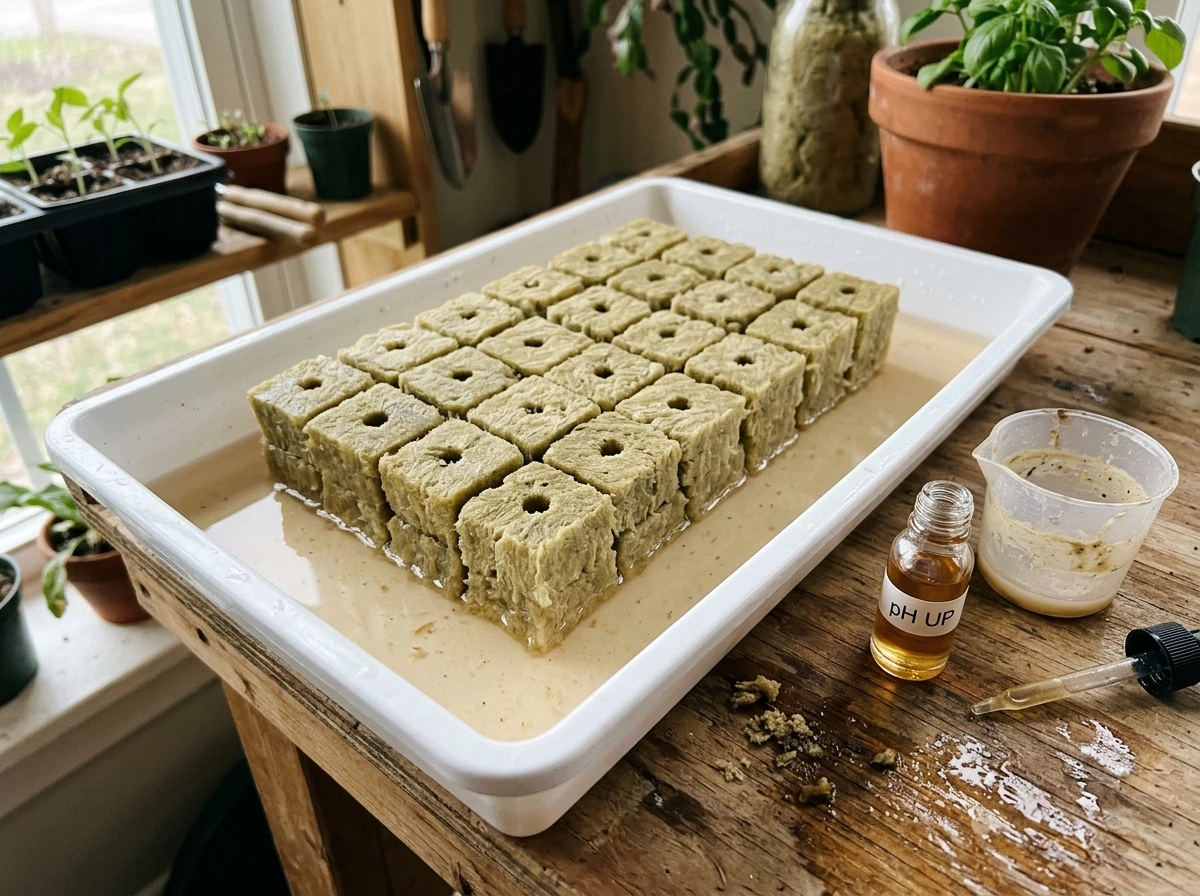
Rockwool cubes are the most reliable starting medium for hydroponic flowers. Before use, soak the cubes for 8 to 12 hours in water with a pH adjusted to 5.0 to 5.5. This is important because fresh rockwool is alkaline out of the bag and will raise your seedling's pH if you skip this step. After soaking, drop one or two seeds into the pre-punched hole in each cube, cover lightly, and keep the cubes moist but not waterlogged under low light or a propagation dome. Germination for most flower seeds takes 3 to 10 days depending on species. Once you see roots emerging from the bottom of the cube (usually 10 to 14 days after germination), the seedling is ready to transplant into your system.
Transplanting seedlings or store-bought starts
If you are starting with nursery seedlings, gently wash as much soil off the roots as possible with room-temperature water before placing them into your hydroponic system. Leaving soil on the roots introduces pathogens and clogs your system. Seat the seedling in a net pot with clay pebbles or rockwool supporting the stem. For the first week in the hydroponic system, run your nutrient solution at about quarter to half strength (around 300 to 400 ppm) to reduce transplant shock. Once you see new growth after 5 to 7 days, begin ramping up to full-strength solution.
Starting from cuttings
Many flowering plants like marigolds and zinnias root easily from stem cuttings. Take a 3 to 5 inch cutting just below a leaf node, strip the lower leaves, and place the cutting into a moist rockwool cube or a cup of plain pH-adjusted water. Roots typically appear within 7 to 14 days. Once roots are 1 to 2 inches long, transfer the cutting into your hydroponic system the same way you would a seedling.
Day-to-day care and maintenance
Feeding and reservoir top-ups
Plants will consume both water and nutrients daily, which causes the EC to fluctuate as the water level drops. Top up the reservoir with plain pH-adjusted water (not nutrient solution) to maintain your volume and prevent EC from creeping too high. Do a complete reservoir change every 7 to 14 days to prevent salt buildup and keep nutrient ratios balanced. When you do a full change, clean the reservoir walls before refilling.
Daily and weekly checks
- Check pH and EC daily or every other day. Adjust as needed.
- Inspect roots for color (healthy roots are white or light tan) and check for sliminess or odor.
- Check water level and top up with plain water if it has dropped more than 10 to 15 percent.
- Inspect leaves for yellowing, spots, or pests.
- Confirm pumps and timers are functioning correctly.
- Check water temperature weekly and adjust if it is creeping above 72°F.
Pruning and plant support
Pinch back young plants once they have 4 to 6 sets of true leaves to encourage branching and more flower stems, especially for zinnias and marigolds. Remove spent flowers regularly to extend the blooming period. Taller flowering plants like snapdragons and gerberas will need support stakes or a trellis net to keep stems upright. In a hydroponic system, this means anchoring support structures to your tray frame or a stand beside the reservoir rather than into soil.
Pollination indoors
If you are growing indoors without pollinators, you may need to hand-pollinate to get seeds or to ensure full flower development on some species. For most cut flowers like zinnias, marigolds, and snapdragons, this is not usually necessary since they do not need pollination to bloom beautifully. However, if you notice flowers forming but not fully opening or developing normally, gently transfer pollen between flowers using a small paintbrush or cotton swab every few days during peak bloom. Running a small fan to create gentle air movement in your grow space also helps with pollen distribution and strengthens stems.
Troubleshooting: what goes wrong and how to fix it fast
Yellowing leaves (nutrient deficiency or toxicity)
Yellow leaves are the most common complaint in hydroponic flower growing. The first thing to check is pH, not nutrients. If pH is outside the 5.5 to 6.5 range, even a well-mixed nutrient solution will lock out key elements. Adjust pH first and wait 24 to 48 hours before assuming you have a deficiency. If pH is fine, check EC. If EC is very low, your solution is likely depleted and needs to be refreshed. If EC is very high (above 2.5 mS/cm), flush the system with plain pH-adjusted water and mix a fresh, weaker solution. Old nutrient solution with salt buildup causes both deficiency and toxicity symptoms simultaneously.
Brown, slimy, or smelly roots (root rot)
Root rot is almost always caused by one or more of three things: water temperature above 72°F, insufficient oxygenation, or an existing pathogen population (usually Pythium). To address it: lower your water temperature immediately, increase aeration if you are in DWC, and consider adding a beneficial bacteria product (such as Hydroguard or similar) to your reservoir. Remove visibly brown or dead root mass carefully. Clean and disinfect the entire system if the rot is severe, then start fresh with a new solution and a clean reservoir.
Green algae in the reservoir or tubing
Algae needs light and nutrients to grow, so the fix is cutting off its light supply. Check every point where light enters your reservoir: lid gaps, clear tubing, and net pot holes. Wrap exposed tubing in black tape or replace it with opaque tubing. Cover any gaps in the reservoir lid. If algae has already established, do a full system flush and clean with a diluted hydrogen peroxide solution (3 percent H2O2 at about 3 ml per liter), then rinse thoroughly before refilling with nutrient solution.
pH and EC drift
In small reservoirs (under 5 gallons), pH and EC can shift significantly within 24 hours. Larger reservoir volume gives you more stability. If you are constantly chasing pH, try moving to a larger reservoir or doing reservoir changes more frequently. EC that creeps upward despite normal plant uptake usually means your top-up water contains dissolved minerals. Consider using filtered or reverse-osmosis water for top-ups if this is a recurring problem.
Slow growth or no blooms
Slow growth usually points to light (not enough intensity or duration), temperature (too cold slows metabolism significantly), or low nutrients. Run through this checklist: Is the light on for at least 14 hours? Is the PPFD high enough? Is the room below 65°F? Is EC in the appropriate range for the growth stage? For poor or absent blooming specifically, check whether you have switched to a bloom-formula nutrient, whether the photoperiod is correct for the species, and whether the plant is old enough. Zinnias started from seed typically need 8 to 10 weeks before blooms appear.
Pests (fungus gnats, spider mites, aphids)
Hydroponic setups are generally less hospitable to pests than soil grows, but they are not immune. Fungus gnats are attracted to moist growing media, especially rockwool or coco. Keep media surfaces as dry as possible between watering cycles. Spider mites and aphids come in on new plant material or through ventilation. Inspect any new plants carefully before introducing them to your system. For active infestations, insecticidal soap or neem oil sprays applied directly to foliage (not the reservoir) are effective for soft-bodied insects. Yellow sticky traps help monitor and catch flying pests early.
Quick-reference troubleshooting table
| Problem | Most Likely Cause | First Step to Fix |
|---|---|---|
| Yellow leaves | pH out of range or depleted nutrients | Check and adjust pH to 5.5–6.5, then check EC |
| Brown, slimy roots | Root rot (Pythium), warm or low-oxygen water | Cool reservoir, increase aeration, add beneficial bacteria |
| Green algae growth | Light leaking into reservoir | Block all light from reservoir and tubing; clean with H2O2 |
| pH keeps drifting | Small reservoir volume or mineral-heavy water | Use a larger reservoir; switch to filtered water for top-ups |
| No blooms forming | Wrong photoperiod, low light, or wrong nutrient stage | Switch to bloom nutrients; check light hours and intensity |
| Slow or stunted growth | Low light, cold temperature, or low EC | Increase light duration/intensity; raise temperature; check EC |
| Pests on leaves | Infested new plant material or airflow bringing pests in | Inspect new plants; apply insecticidal soap to foliage; set sticky traps |
FAQ
Do I need to use expensive hydroponic nutrients to grow flowers successfully?
You do not need the most expensive brand, but you do need a consistent, two- or three-part formula and reliable mixing instructions. If you are reusing water less often (like in a small reservoir), choose a nutrient line that tolerates frequent adjustments, and measure EC and pH after mixing, not just at the start.
How do I prevent salt buildup if I cannot do full reservoir changes every 7 to 14 days?
If you must stretch changes, increase top-ups only with plain pH-adjusted water (no nutrients) and watch EC closely. When EC rises faster than the plant uptake would suggest, do at least a partial drain and refill, and clean the reservoir walls during that event.
What EC and pH should I target if my flower species is not listed in your guide?
Use the closest “group” based on growth speed and sensitivity. For unknowns, start at the lower end of the EC range and keep pH inside 5.5 to 6.5, then adjust by observing the next 24 to 48 hours. If you see yellowing, confirm pH first, then EC, before changing nutrient ratios.
Can I grow hydroponic flowers without controlling water temperature?
It is possible for short periods, but it increases risk. Keep reservoir water as close as you can to the 65 to 72°F range, because warmer water drops dissolved oxygen and encourages root pathogens. A simple insulation wrap around the reservoir or placing it away from heat sources can help if you cannot actively chill.
How often should I check pH and EC in DWC versus ebb-and-flow?
In general, check daily if your reservoir is small or if you are seeing drift. DWC tends to change more smoothly but can still shift between checks, while ebb-and-flow can swing more after flood cycles. If you consistently see large overnight changes, increase check frequency or increase reservoir volume.
My leaves yellow but pH seems in range. What should I check next?
After confirming pH is truly stable (not just momentary), check whether EC is unusually low or high and verify light intensity. Also inspect roots for oxygen problems, since brown, slimy, or matted roots can cause nutrient uptake failures that look like deficiencies. Finally, confirm you actually switched to a bloom-appropriate nutrient when buds appeared.
Do I need an air pump if I am using ebb-and-flow?
Usually not in the same way as DWC, because the flood-and-drain cycle pulls air into the root zone. That said, some setups add aeration to improve consistency, especially in warmer rooms or if your drain cycles are slow. If roots ever look oxygen-stressed, consider increasing aeration or tightening the cycle timing.
Why do my seedlings stall after transplanting into rockwool?
Transplant shock is often caused by starting too strong, letting cubes dry out, or pH being off. Run nutrient at reduced strength for the first week, keep cubes evenly moist but not waterlogged, and make sure the rockwool was properly soaked and drained before seeding so it does not keep raising pH.
What is the best way to top up reservoir water so EC does not keep rising?
Top up with plain pH-adjusted water, not mixed nutrient solution. This helps prevent EC from creeping upward due to mineral content. If you have recurring EC drift upward, use filtered or reverse-osmosis water for top-ups because tap water can introduce dissolved salts.
Can I use soil to start seeds or seedlings and move them into a hydroponic system?
You can, but you need to remove soil from the roots before hydroponic placement. Leaving soil causes pathogens and can clog or contaminate your system. Wash with room-temperature water gently, then plant into net pots with a clean supporting medium.
When should I support taller flowers, and how do I anchor supports safely?
Start support early once plants begin to stretch, instead of waiting until stems are heavy. Anchor trellises or stakes to the tray frame or a stand beside the reservoir, not into soil, and ensure the structure does not interfere with flood cycles or net pot stability.
Do I need to hand-pollinate hydroponic flowers?
Most cut-flower types listed do not require pollination for good blooming, but hand-pollination becomes useful when flowers form but do not complete development, or if you specifically want seed. If you do hand-pollinate, do it gently with a small brush and combine it with consistent airflow so stems and flowers develop normally.
What causes algae, and how do I stop it before it becomes established?
Algae grows from light plus nutrients, so cover light entry points like lid gaps, clear tubing, and exposed reservoir surfaces. Use opaque tubing or wrap exposed sections, and check net pot holes where light can penetrate. If algae already took hold, flush and disinfect, then rinse thoroughly before refilling.
How do I choose a starting medium if I cannot get rockwool?
Rockwool is the most forgiving starting medium, but alternatives like coco coir-based cubes can work. If you substitute, pay extra attention to pre-soaking or conditioning so the starting pH does not swing after transplant, and keep germination moisture consistent to avoid damping-off.
Why are my plants growing slowly, but pH and EC look okay?
Slow growth can be light or temperature related even when chemistry is correct. Verify PPFD and that you are providing the right daily photoperiod, and confirm the room and reservoir temperatures are within range. If everything checks out, compare your nutrient stage, vegetative versus bloom, and confirm the plant age is long enough for that species to flower from seed.
How can I stop fungus gnats and other pests in hydroponics?
Keep the media surface as dry as possible between cycles, since gnats are drawn to moist growing media. Quarantine any new plants before adding them to the system, use sticky traps to detect early flying adults, and treat foliage directly for infestations rather than targeting the reservoir.